Parrot on WSL2

Installing on WSL2

Note: This option only works in Windows 10, where our final set up will include a GUI and CLI for Parrot OS by upgrading a Debian WSL app.

WSL 2

Follow this tutorial via Microsoft Docs

Requirements:

Running Windows 10, updated to version 2004
Build 19041 or higher.
64-bit Machine (for Kernel Update)

Install WSL

Open PowerShell as Admin and run:

dism.exe /online /enable-feature /featurename:VirtualMachinePlatform /all /norestart

Restart your machine and complete WSL install

Update to WSL 2

Open PowerShell as Admin

wsl --set-default-version 2

If you see

WSL 2 requires an update to its kernel component. For information please visit aka.ms/wsl2kernel

Download and install the MSI x64 Linux Kernel.

Install Debian

  1. Open the Microsoft Store and select Debian distro
  2. Get and install the application
  3. Create a unix user account (ex. parrot) and password
  4. Ensure that Debian is running on WSL 2

Powershell

wsl --list --verbose
wsl --set-version <distribution name> <versionNumber>

Success! You now have WSL2 and Debian installed :slight_smile:

Debian → Parrot :parrot:

Let’s get to the fun stuff!
In your CLI, copy and paste to get the parrot-install.sh
Alternatively, copy the raw text if you don’t trust me :sob:

curl https://raw.githubusercontent.com/ParrotSec/alternate-install/master/parrot-install.sh -o parrot-install.sh
chmod a+x parrot-install.sh
sudo ./parrot-install.sh

Select 1. Install Core Only

Why: This will get the correct sources.list for the parrot repositories.
I highly recommend this option!

Update works, but upgrade returns:

  • 404 archives/packages not found

Previous: /etc/apt/sources.list
New: /etc/apt/sources.list.d/*

debian.list (empty)
parrot.list (auto-generated)

My parrot.list

deb https://deb.parrot.sh/parrot/ rolling main contrib non-free
#deb-src https://deb.parrot.sh/parrot/ rolling main contrib non-free
deb https://deb.parrot.sh/parrot/ rolling-security main contrib non-free
#deb-src https://deb.parrot.sh/parrot/ rolling-security main contrib non-free

You may use ANY mirror, but I the rolling release was the only successful endpoint for upgrading.

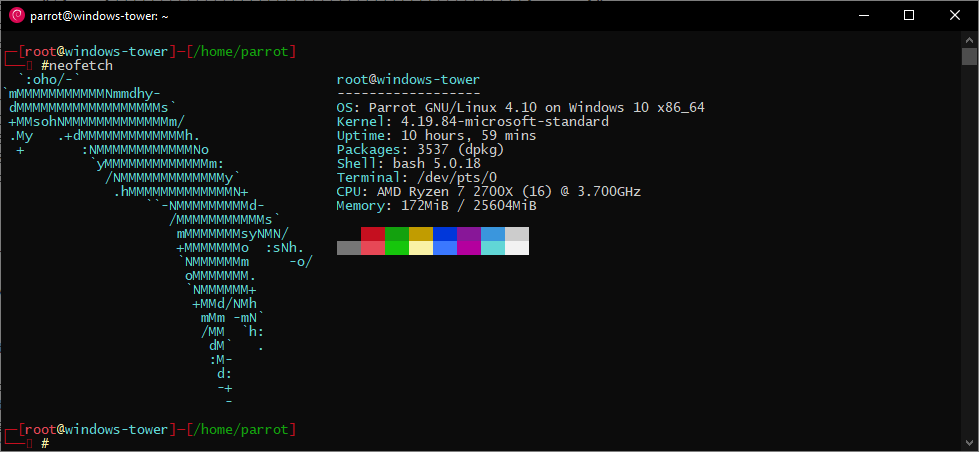
When you enter root you should see the parrot CLI styling :sparkling_heart:

To Upgrade

sudo su
parrot-upgrade

This will install all dependencies for the OS, and important packages, but no security tools, or GUI.

Installing a GUI

apt-get install parrot-interface parrot-interface-full parrot-tools-full

Installing Security Tools

apt -y --allow-downgrades install parrot-interface parrot-interface-full parrot-tools-full

To Access the GUI

As of now, we should have a WSL 2 instance with all of the bells and whistles.
So, to access this machine, we will use the onboard application, Remote Desktop Connection.

LAN XRDP Server

This will create an access port on your Local Area Network through the WSL network adapter.
Allows you to connect to an operating system.
Note: You can only remote into a single WSL machine at a time (b/c they share an IP address)

apt-get install xrdp

I created a bash file (rdp.sh) with

#!/bin/bash
/etc/init.d/xrdp start
ip addr

Output
Side Note: I recommend Windows Terminal (Preview) for WSL2


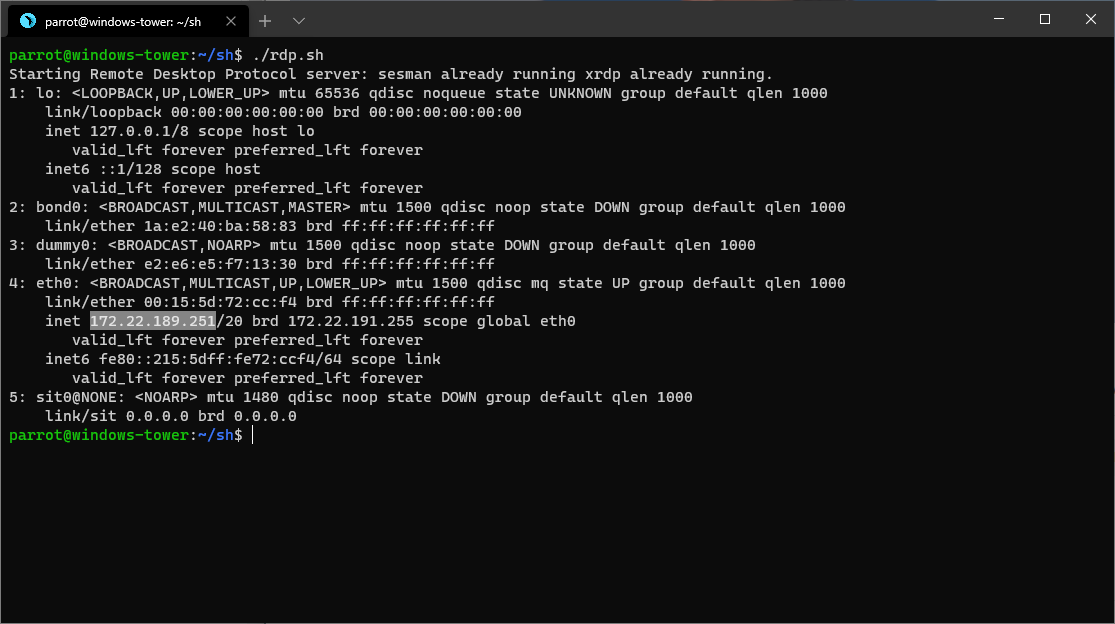
Highlighted is the IP Address you are looking for.
Enter this into the RDC program and click Connect.
RDP
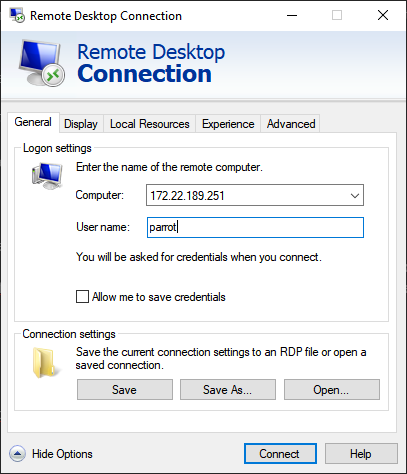
Once you enter the creds into the XRDP Server, you may now access the Parrot GUI.

And it works :slight_smile:

4 Likes

We don’t officially support WSL2 but good to know it works. Maybe you can create new full tutorial so @tissy can add it to our doc?

@dmknght Yeah I’d love to contribute :slight_smile:. Since this works with Kali Linux, I figured it was worth a try.
It’s essentially “building Parrot from scratch” but ya’ll made it a LOT easier!

What are you looking for regarding documentation?
Where could I submit this and in what format?

You can edit the topic to [Tutorial] and write here. The forum supports markdown syntax. We’ll copy it and add you to list of contributors :smiley:

@dmknght Done! Lmk if there is anything else I should include :gift:

FYI, I could only include two links in my post, I wanted to include the MSI link and How-To-Upgrade Community post.

Oh i don’t know much about that. @tissy can you help him about the writing tutorial please?

Hi, sorry for being late. I am also new to ParrotSec OS, but does wsl2 use the pre-built wireless adapter of Windows? Can you use major programs like Nmap, BurpSuite, and Ettercap?

yes sure it does

1 Like

I saw you message about the public key. Did you resolve it with verify-keys tutorial?

I had the same issue, but it was too late to change this thread

Well kinda… I didn’t have all the packages to get that pub ,I did manual installing for each one

so i tried this tutorial and got up to getting parrot-install.sh on the system but instead of installing core only i selected security. /etc/apt/sources.list.d/* access is denied or not found (its tempramental). and i cant update or install anything as it cant be found or the public key is not available. should i reinstall debian and start from there or can i save this?

Did you get this to work?

  1. Set up the public key immediately after installing core for the security packages in some cases return 404 due to a failed mirror list
  2. Regarding Access denied did you run it as root? and then try to access it as a user?

Since this is purely a sources.list issue, you can just delete the sources.list.d/ dir and just copy the sources.list from Debian :slight_smile:

Lmk is this is helpful!

I’m having some issues with the install
Err:1 https://deb.parrot.sh/parrot lts/main amd64 libtext-iconv-perl amd64 1.7-5+b7
404 Not Found [IP: 104.27.130.193 443]

WSL2 system allows user to import tarball file. So Parrot team can try very first WSL2 build for 4.11

I’ve managed to have Parrot runs on WSL 2 after tons of trials and errors.
Some issues I encountered:

  1. the script ran and failed later because I didn’t have gnupg, gnupg1, and gnupg2 installed
  2. getting a 403 forbidden from some mirrors
  3. failed resolving DNS for https://deb.parrot.sh
  4. getting 404 not found when the apt is updating files

What I did:

  1. installing gnupg, gnupg1, and gnupg2 before running parrot-install.sh as fresh Debian from Microsoft store doesn’t include them
  2. ping the https://deb.parrot.sh to get the IP, put the IP into /etc/hosts
  3. using VPN to connect to another country since I still always get 403 forbidden from the mirror in my country – also ping the domain I select from APT Mirror list and put the IP into /etc/hosts
  4. ignoring the 404 not found
  5. using the rolling instead of lts (to solve the 404 I think) as described by thread starter (manually edit the parrot.list after successfully running the parrot-install.sh and before running the parrot-upgrade)

Hopefully it will be officially supported in the future.

3 Likes

I had a similar issue, I rewrote the script to prevent it from wiping out the debian repo list and updated from lts to rolling release.
I did notice a memory issue when trying to run xrdp, seems to slowly increase over a very short time. this forced me to shutdown debian.
It would be awesome to see the implementation of something similar to winkex for kali.

We would like to do that but we need more devs for this.
it would be nice to have wsl 2 image instead of just build from debian repo which we can’t really control the quality build.
If anybody has experiences on this and want to contribute feel free to send email to [email protected].

3 Likes

I had a similar thought; right now Parrot’s filesystem.squashfs is being compressed to a tar.gz which will then be imported into WSL2 and I’ll go ahead set it up from there. Previously I’d been using Kali but wanted to switch out back to Parrot, as I haven’t visited Parrot in a while and felt like coming back. I’ve been trying to build a secure WSL2 image for the sake of a pentesting project I’ve been working on. I’ll be making a distro installer and you can find that project here.
Win-KeX was a thought that crossed my mind and as soon as I was about to make a comment I’d seen someone else already did, which was pretty cool! I think I’ll be working on that myself shorty after I get Parrot working here. I’ll be making a GitHub for that when I begin - I already have a fixed systemd & kalitorify installer for Kali, inspired/built off of Parrot’s torifying script. It’s working just fine as far as I know and I had it running on my kali build.
I’ll go ahead and be grabbing win-kex from the package manager likely tomorrow and such and taking it apart to see how I can change things around to work with Parrot (and work well). I’d like to see it happen, and if Parrot doesn’t have the devs for this, I’ll just have to do it myself! I could use some help though, so here’s the GitHub project for now; it’s empty at the moment (it’s 5 in the morning), but I’ll start uploading everything over the next few days.

If Parrot devs are interested in working with me at all to help me out with some questions that’ll be awesome; I’ll be emailing them when I’m ready.
As for the community, I’ll probably need your help too, and your guys’ creativity and engineering skills would be more than welcome. Discussions are open.

See you there!

awesome tutorial

just to point out in case anyone suffer the same issues as me
issues encountered when installing this:

  • when running the install script had an issue with a public key not available

The following signatures couldn’t be verified because the public key is not available: NO_PUBKEY “363A96A5CEA9EA27”

  • Also found an issue about the dns not resolving properly in WSL

what i did to fix this issues:

  • For the key issue i tried importing the key with several key servers but they were failing, but the one that worked for me was

sudo apt-key adv --keyserver hkp://keys.gnupg.net:80 --recv-keys 363A96A5CEA9EA27

Credits to this article, there is a message from Chris Jean the February 27, 2020 that has various alternative servers. I could import the key from there.

  • Regarding the issue of the dns, i did 2 things:
  • Modify the file with the dns config /etc/resolv.conf to point to google dns servers “8.8.8.8”
  • And to avoid having issues with WSL changing this i also modified the config file /etc/wsl.conf to add this 2 entries:

[network]
generateResolvConf = false

After this all the setup was smooth.
Thank you for the tutorial again, you all made a process that could be painfully slow and tedious into a very easy and enjoyable experience

Thank you to everyone involved.

Palinuro can support this

That is not our official scope for now but we surely love to support this.

1 Like