DISCLAIMER: Only use KISMET to test your own network device behaviors & those you have permission to work with. Features listed should only be accessed by those following local laws. Test your own network/devices & those you have permission for only.
Requirements:
Network card supporting Monitor Mode.
KISMET setup on Linux (Parrot Security shown here for demo)
What is KISMET?
KISMET is a passive sniffing application packed with powerful analysis tools/plugins.
There are many passive sniffing tools out there, but KISMET is by far the most notorious, & one of my favorites for filter analysis in my own network. In the past it was available in ncurse/terminal version, we can now administrate KISMET directly from our web browser, locally or remote (do not try to setup remote access without following proper security protocols).
As a passive sniffer it is able to analyze/detect not only ‘public’ broadcasting SSID networks but also ‘hidden networks.’ Has the power to detect/analyze MAC addresses from personal cell phones/vehicles to wifi/bluetooth devices.
Provides a great platform for analyzing possible security risks/attack assessments on your own network:
Ex #1: when someone sends Deauth packets to your Router, KISMET alerts you with a ‘red notification’ about possible sniffing/DoS attacks being perpetrated on your device… KISMET will name the current MAC address of your attacker & also the MAC of the network being attacked making it function as an IDS (intrusion detection system). It analyzes relationships between devices helping build a better profile/location on your attacker.
Ex #2: there were devices on my network that had unreliability. These smart devices would commonly get disconnected without any interference. These disconnects led to many handshake packets being passed & justified stricter management of those devices.
There is also the possibility of tracking networks/devices down to their location. Including the ability to utilize GPS (requires GPS device/phone setup to enable). Without GPS you have the option of following towards the direction of the signal itself. This could help one locate illegal hidden wifi based cameras setup without your permission on your property/business (cameras watching keyboards for passwords, placed illegally in business bathrooms etc) among other devices you need to know about.
Criminals may plant illegal wifi accessible tools at a high profile residence or place of business. At times a more advanced attacker may attempt to plant backdoor hidden networks in order to get back in without directly accessing routers/logs. You should be aware of any potential hidden wifi access points accessible on your property/business.
KISMET may help you in the tracking down of stolen cell phone/laptop MAC addresses (attempting such follow due diligence. Check into local laws/regulations before running KISMET. May not be legal without a warrant of some form due to certain KISMET capabilities. Check into it.).
KISMET is able to quickly analyze connections/communications made between MAC addresses to see what MAC is accessing/communicating with what network, which MAC’s have shared same network, helping to track down potential lost devices/thieves.
Getting Started:
First put your wifi card in Monitor Mode:
ifconfig wlan0 down;iwconfig wlan0 mode monitor;ifconfig wlan0 up;
After this check to ensure it is in promiscuous mode by running:
ifconfig
If monitor mode has been set successfully, your wifi card info should appear as shown in the screenshot below:

After this you need to edit /etc/kismet/kismet.conf (this file bypasses any rules set in ~/.kismet/*)
scroll down the file until you find where it says source=. Put your monitor mode wifi device from the previous step. As shown in the picture below:

Make sure Parrot’s AnonSurf is off while using KISMET because we are going to need to directly connect w/firefox to our local machine (AnonSurf may or may not interfere w/ Firefox).
Now run:
sudo kismet
If you want to run KISMET in the background you can run it as a daemon:
sudo kismet --daemonize
Just be aware running it in the background will not print out as many msgs on your screen for reference.
You can also later setup a kismet user with tighter privileges. This guide is to get you started.
If you have configured everything right, you should see output as shown in the screenshot below. MAC addresses should start showing up. Pay attention to the top red square of KISMET output. It should show the web address you should be connecting to/administrating from. From here it will ask you to setup your login/password
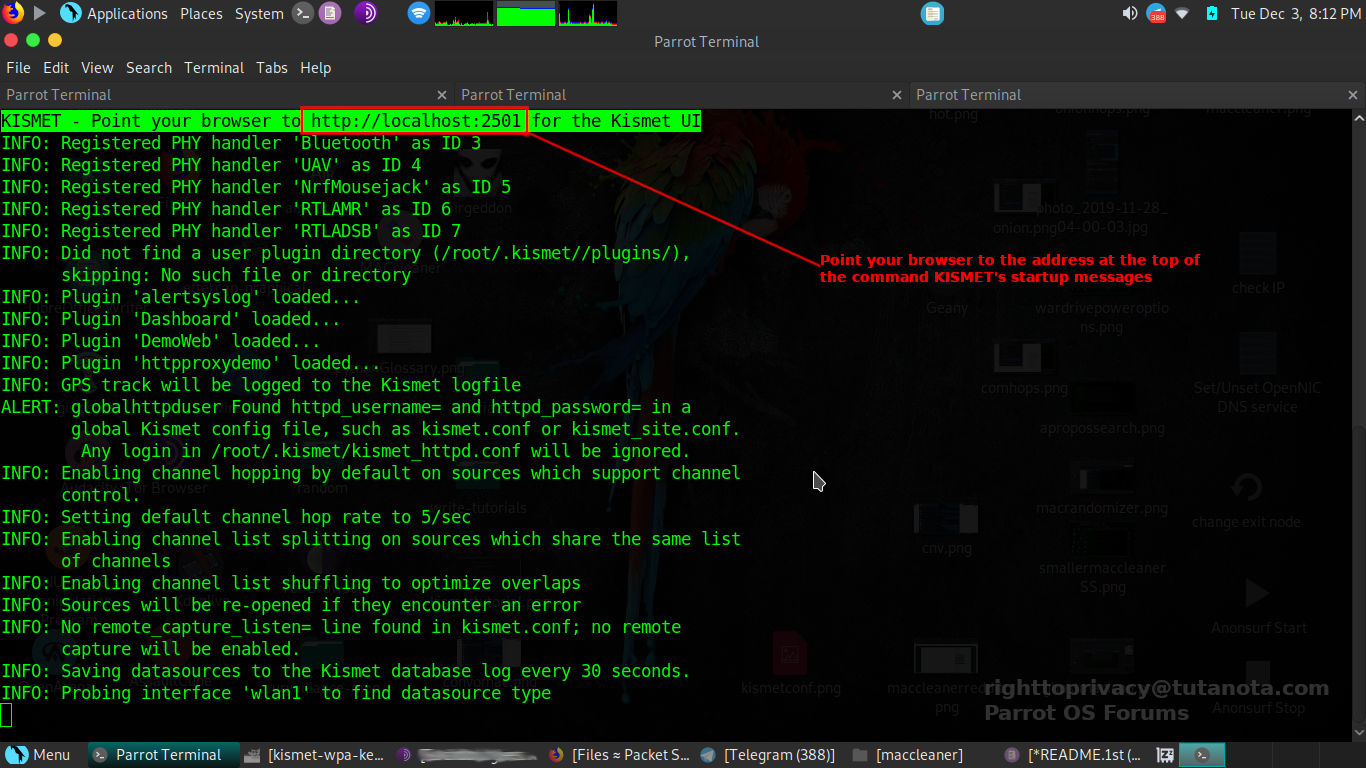
You are going to need to make a new login/password for KISMET.
After you have setup your login/password, it is time to login!
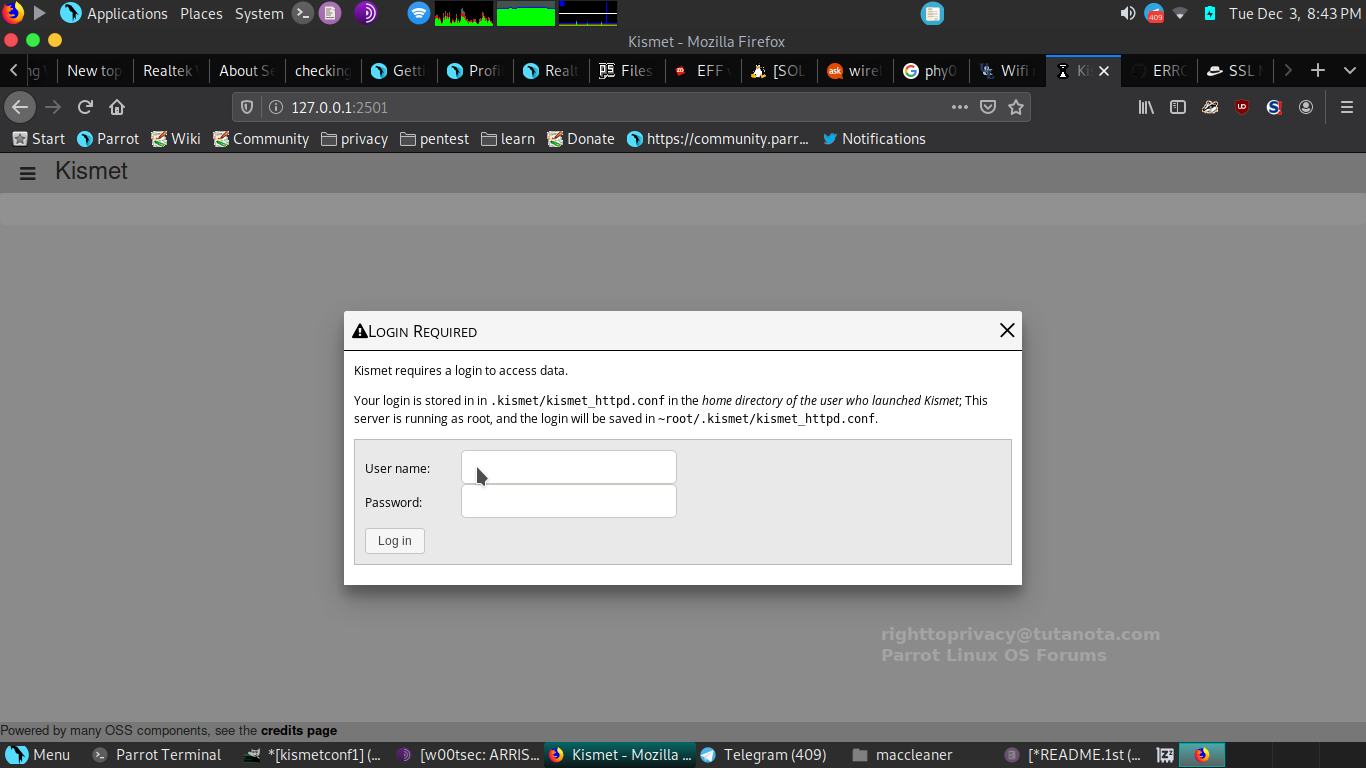
Once you login you will find a full web page for KISMET administration filters/options. KISMET is great, offering a highly organized clean easy touch layout design.
At this point if you are part of a Red Team & want to become invisible/unrelated to networks this is the time to run something like macchanger program (comes with Parrot) or the script I wrote: maccleaner (changes mac addresses to verifiable continuously changing random addresses at continuously randomly changing times). KISMET is the type of thing maccleaner works best for (and traveling). You can read my post on maccleaner here for more information:
https://community.parrotlinux.org/t/change-mac-address-random-intervals-script/10711/2
(maccleaner not required but it relates to passive sniffing defense)
This tutorial was also partially a demonstration of the types of MAC address tracking systems there are out there commonly used by advertisers/businesses.
A great feature of KISMET is it’s ability to handle continually change mac addresses without shutting down in error. This is not true for Wireshark which shuts down on the first change of mac address.
At this point you can look through the many features of kismet. I have worked up a screenshot below for your reference:
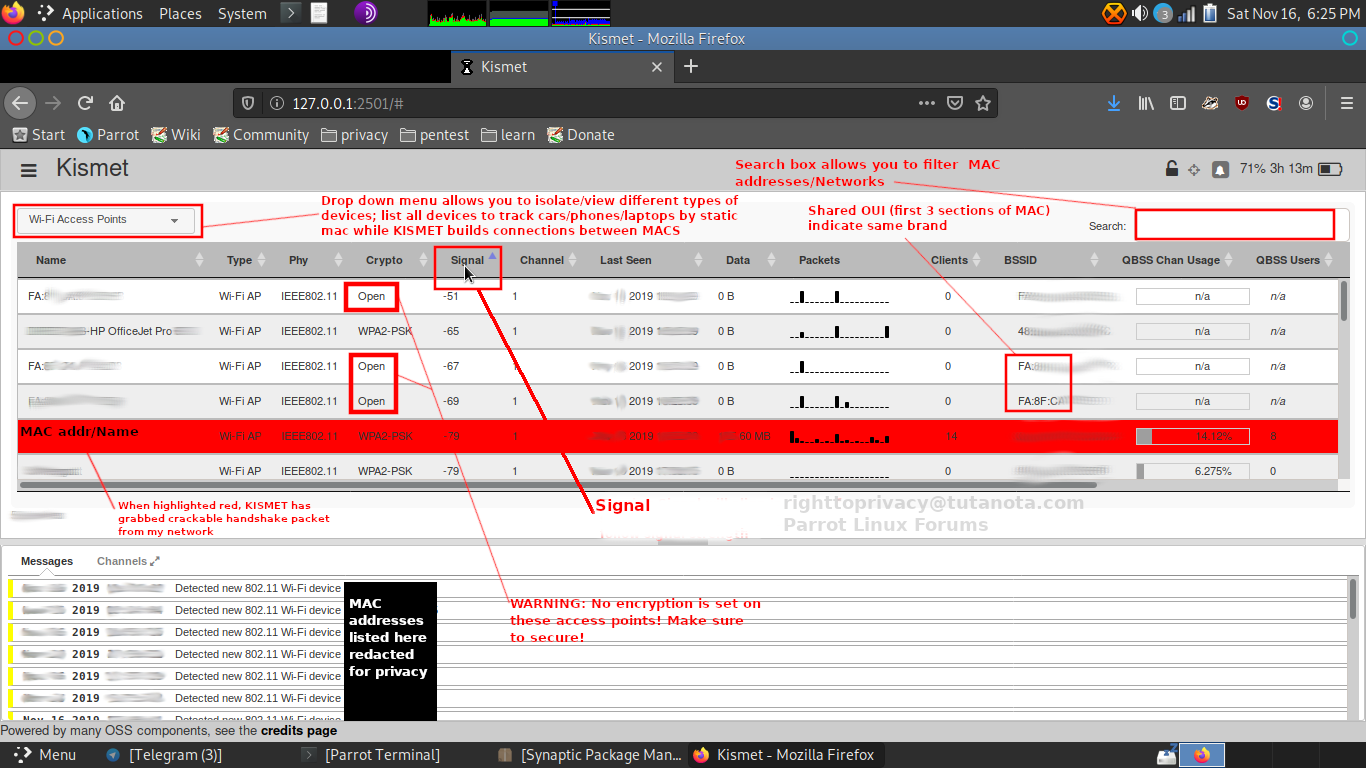
As MAC addresses communicate broadcasts can reveal new relationships.
As time goes on you may see captured PMKID/completed handshakes on your network. These are crackable if you are working as a Redteam/Ethical Pentesting group.
When KISMET gains a complete ‘handshake’ exchange it saves it as an aircrack compatible handshake file, the network in question will light up red once a complete handshake is captured. You can then click on the network and expand to download this pcap file:
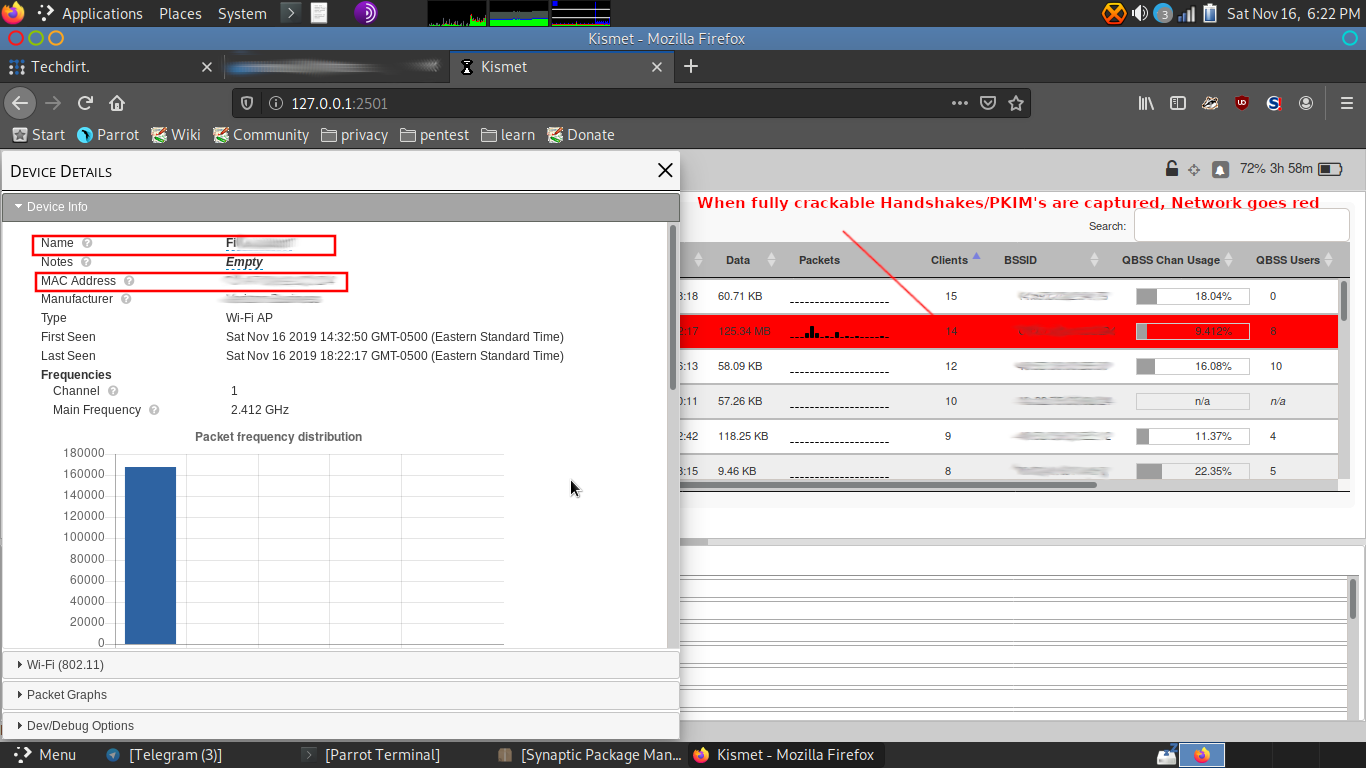
Below you can see the link to download the crackable pcap:

From here, I trust you can explore, and figure the rest out.
Enjoy 