I need help downloading the right drivers for a MacBook Air 2019 i5 intel chip.

– Please Write here your help request, –
hello I am trying to USB live boot from my 2019 MacBook Air i5 intel and I cant find the right guide online on how to install the right drivers for the keyboard, trackpad and wifi card.
I also need some help with creating persistence. the guides I saw online we kind of confusing, I saw someone download the parrot iso file inside their parrot os to create persistence and that kind of confused me because why would you need the iso file to create persistence when the OS is already running?


  • Parrot version in use (if you are not aware of it, open terminal and type cat /etc/os-release | grep VERSION):
    I am using the most recent parrot os 5.1 and I am booting live from USB.

  • Kernel version (if you are not aware of it, open terminal and type uname -r):

  • Logs/Terminal output (use pastebin or similar services):

  • Screenshots:

Installing any GNU-LINUX on to a mac is not simple, the kernel will include most of the required drivers, wi-fi is often a problem so make sure you can either hard-wire to the router ,or, teather to a mobile phone.

which kernel are you talking about?
the one that comes with the MacBook hardware of the iso linux boot?

Hey hey I’m having the exact issue with my older MacBook Pro 2012, Intel processor as well, Parrot installs for the AMDX64 best and doesn’t play well with Intel. I get an applet error and the window applets in the GUI close randomly but as stated above wifi doesn’t connect at all in fact it shows a wired connection but there isn’t one. There is GitHub repos that have some fixes though.


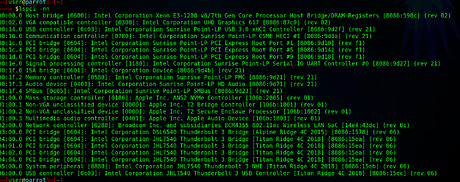
i ran the lspci command i this is what i got. i dont know which device is the trackpad and keyboard but i can tell which one is the wireless card
after that i also ran the apt search BCM4355 command but didnt get any results.
what should i do next?
any recommendations?

the Linux Kerne

Welcome to the forums
are you trying to install to a VM or direct to hard-drive?
First if it’s in a VM then you will not be able to connect directly to the on-board Wi-Fi but through the host OS bridge [shown as a wired connection]
If you are trying to install direct to hard-drive, you will need to install the WI_FI drivers . I believe your machine has a broadcom 43*** wi-fi card, so you will need a secondary internet connection, either hard-wired to the router or via tethering a mobile phone.

the following should work with most BCM products

easy way [if it’s available in your repositories] open software manager , in the search box type bcmwl if its available it should be the first item on the list, if its there click install, job done

if not try from the teminal
sudo apt update and enter then when that’s done
sudo apt install bcmwl-kernel-source and enter then when that has done
sudo modprobe wl and enter now when that’s finished
RE-boot
you will have to add your password when asked

1 Like

i am usb live booting
when i ran sudo apt install bcmwl-kernel-source it returned unable to locate package.
i also remember seeing a suggestion somewhere saying that i could update /etc/apt/sources with something that could get me extra resources from apt install is there a source that could apply to this case?

Hi @Tropical-Smootie

lets try something else [I hope you have a secondary connection to the internet]
from the terminal, run inxi -Nn [you may need to install inxi] and paste back the results [ if you post a picture, make sure it’s square and legible [my eyes are old]

1 Like

tried to replicate your problem using the latest Parrot security build on my old dell[ which also has a broadcom 43** wi-fi,
and sorry to say I could not, it found and installed the correct driver first time.
this is my inxi output
Network:
Device-1: Marvell 88E8040 PCI-E Fast Ethernet driver: sky2
IF: enp9s0 state: down mac:
Device-2: Broadcom BCM4312 802.11b/g LP-PHY driver: wl
IF: wlp12s0 state: up mac:

First, the really obvious stuff, most people’s idea of persistence is something that would work like any installed OS, however, that is NOT how persistence works on a ‘normal’ USB install…

Most ‘Live’ distros are actually an ISO file, ( a ‘fixed’ image), that has been written to USB…
Let’s say you have a 32 GB USB stick, and the Parrot ISO image you wrote to it was 4.5 GB, the rest of the USB would be ‘wasted’ space, as the only part that would be seen is the ‘fixed ISO’.
What persistence offers is to allow you to create a second partition in this otherwise ‘wasted space’, and use that for storing any data you need to keep (persistence) it won’t allow the ‘fixed’ ISO part to be changed, so no OS updates possible, not even extra drivers etc…

If you wanted a ‘bootable installed OS that can be updated’ on a USB, you would need 2 USB sticks, one with an installer image on, and a second to use just like any other hard drive target and install Parrot fully to the USB, allowing it to use all the available space and OS updates etc are then possible!

2019 Mac with an i5 I would instead run parrot or any other pen test distro in a VM its less painful… (this is what I do on a 2017 MBP)

The WiFi is pretty easy if you have another internet connection (ethernet for example)

sudo apt-get install broadcom-sta-dkms linux-headers-$(uname -r)

That will download the kernel extensions to build with and the broadcom sta build scripts, and compile and install them.

A reboot should then be all thats needed to use the broadcom WiFi…

I suspect though your in catch 22 where your chipset isn’t recognised, so you can’t update anything… and the installer doesn’t support your Mac ‘out of the box’

1 Like

i ran the command and restarted the machine.
the wifi icon wont pop up. nor in the wifi config can i see any results suggesting the wifi card working or picking up any wifi signals.
any suggestions?

i didnt get the same reuslts when i can the inxi command. i didnt see any results suggesting the wifi card.

inxi -Nn [for network report]
inx -Fnxxz [for a full report if your system]

Usually you have to set up wpa supplicant to make it work…

Setting up WiFi from the command line, launch a terminal window first, then type the following commands;

First, find the name of your wireless interface;

iwconfig

this will return the name of your WiFi adapter, in my case it was wlp3s0b1 so this will be used in the rest of the examples where needed, replace this with the name of your own adapter.

Next, using the Network name (SSID of the router) and the WPA2 Password (the pre shared key from your router) set up the WPA Supplicant file to connect via WPA2 using the following syntax;

sudo wpa_passphrase NetworkSSID PreSharedKey /etc/wpa_supplicant.conf

Note that there is only a single space between items, this will create the file wpa_supplicant.conf and populated it with the network name, network password (commented out), and a generated Hex value password key that the system will actually use instead of the plain text password given.

Now, we will make the adapter use this new file;

sudo wpa_supplicant -B -c /etc/wpa_supplicant.conf -i wlp3s0b1

The -B tells it to send this to the background, and the -i is for the adapter, mine was wlp3s0b1 replace this with your own found earlier.

Next, we just need an IP address;

sudo dhcpcd

That’s it for WiFi, you should now be connected to the internet.

2 Likes

I’m done with live booting lol I had to reinstall the whole Mac OS after pulling the usb out of my Mac before the shutting down completely lol
but thank you.

I just installed the security edition on VMware Fusion.

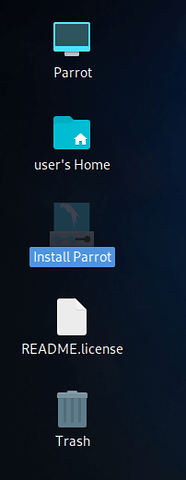
what is the install Parrot app on the desktop after installation?
how do I complete the partition step the right way without messing with the OS?

what is the install Parrot app on the desktop after installation?

I assume you mean WHY, in which case you did not remove the installation medium [pen-drive] before you re-booted, so Parrot has not completed its set up

what do you mean ‘pen-drive’
I stopped live booting, this is a VMware Fusion instance.

and how do I complete the setup, mostly the partition part without messing my hard disk?

Did you use an ISO image mounted in your VMWare Fusion?
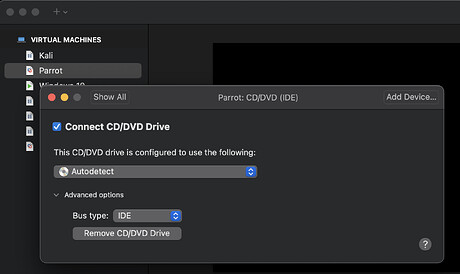
You have to unmount the DVD drive…


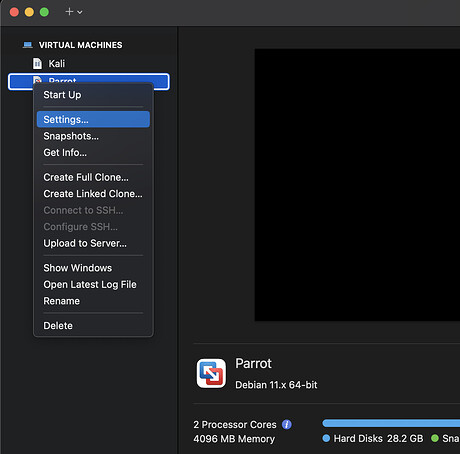
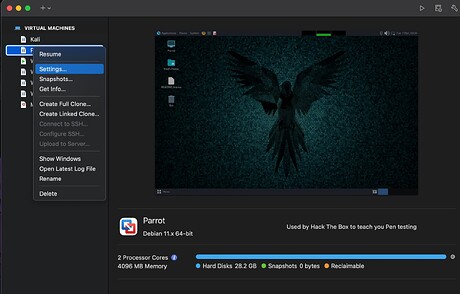
1 - make sure Parrot VM is fully shut down, in VM management screen, right click on parrot VM and choose 'settings


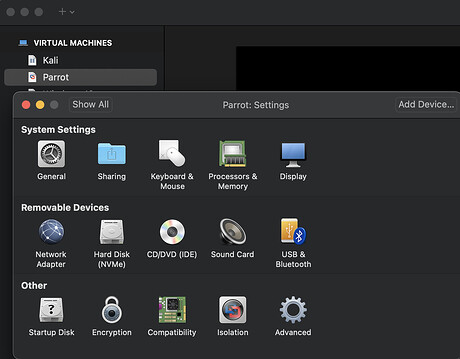
2 - in the settings menu click on DVD drive


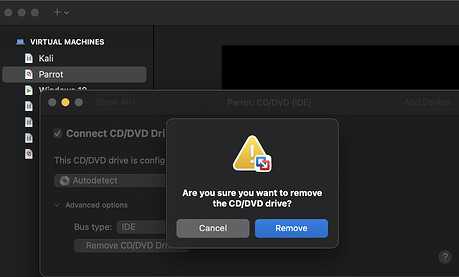
3 - then click onremove the DVD drive
( note * In this menu is also where you would ‘mount’ your ISO image of an OS to be installed too, where it says auto detect, you can use the drop down menu to point it to your ISO image )


4 - confirm remove drive


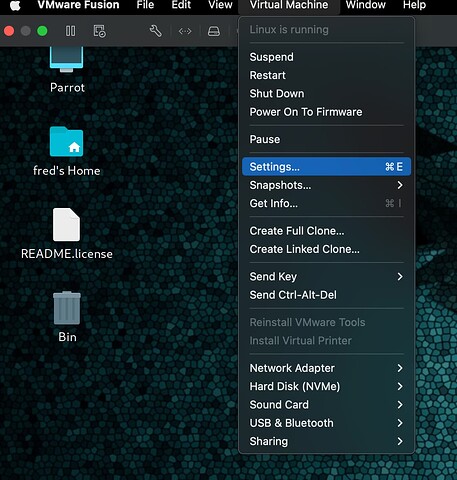
5 - check DVD is gone


6 - or you can check from the running VM menu

2 Likes

You set up a ‘virtual disk’ in the settings to install Parrot or any other OS on, and then you install Parrot to this disk as if it was a normal hard drive. If your using the latest version of VMWare fusion, choose disk type NVMe and ‘split disk’ for all of your VM’s, you’ll get a massive improvement in performance over any other type of virtual disk :slight_smile:

If you have used any other type of virtual disk to install, you’ll have to delete it and start again to use the newer disk type, you can’t change it once the OS is installed. (SATA or SCSI settings are very slow by comparison)

This topic was automatically closed 120 days after the last reply. New replies are no longer allowed.